

Objective
In this article, I will be walking you through how to install and launch an Apache HTTP web server using EC2 User Data scripts. We will then create an Amazon Machine Image (AMI) from the instance, and finally, we will create a new instance using the newly created AMI.
Pre-requisites
An AWS account (probably a free-tier account)
IAM user with Admin privileges.
Brief Introduction
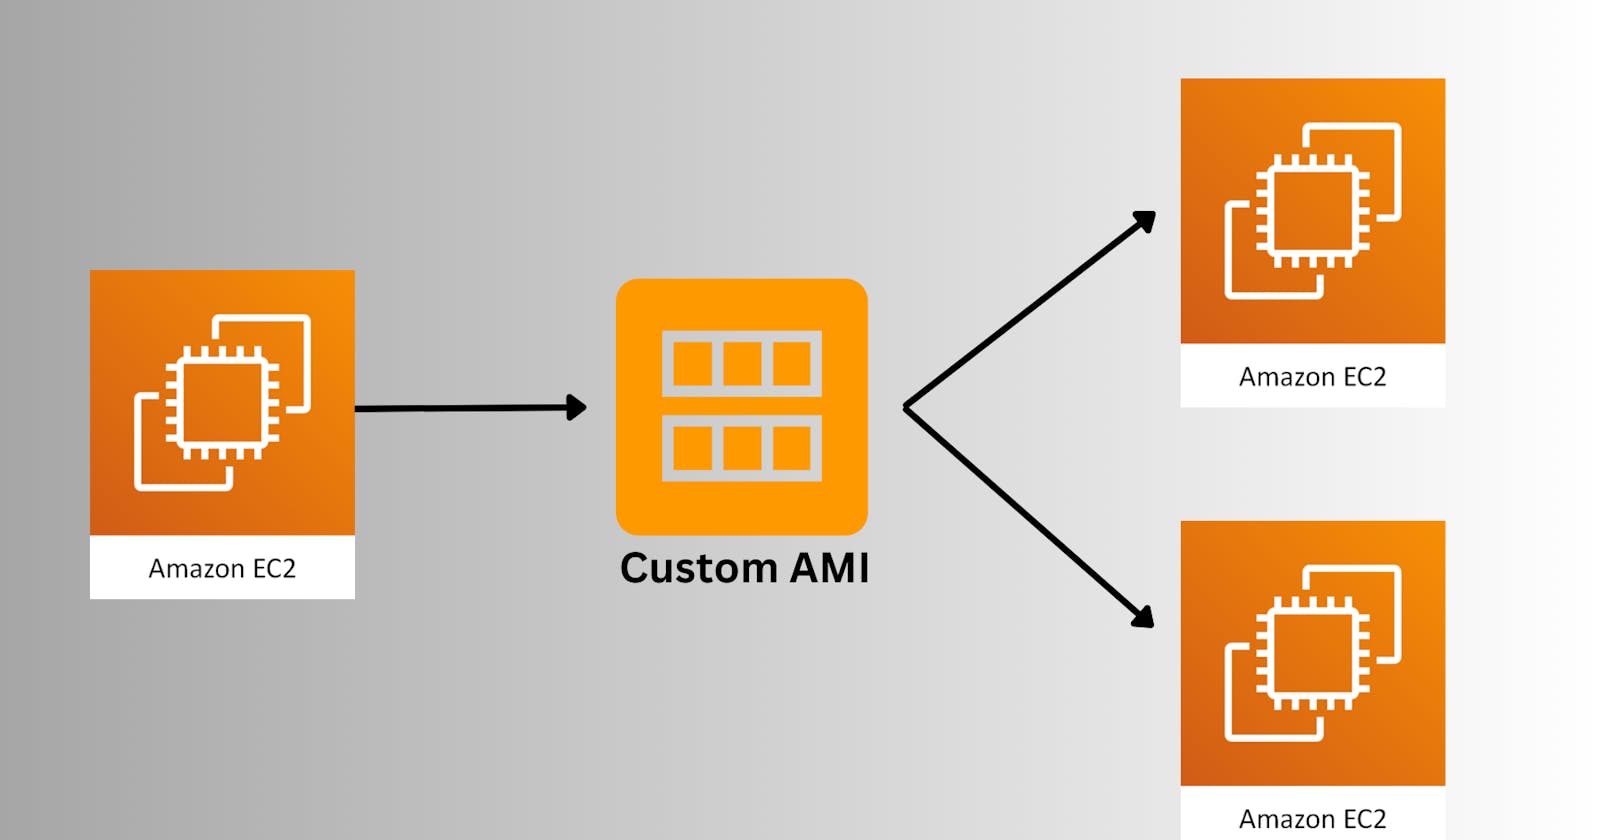
AMI stands for Amazon Machine Image, which is essentially a pre-configured virtual machine image that you can use to quickly launch instances in the AWS cloud.
A custom AMI is a tailored version of an existing AMI that has been modified to include custom software, security configurations, and other desired settings.
THE WHY?
Why is it beneficial to launch EC2 instances from a custom AMI?
Having to manually configure multiple EC2 instances with the same software and settings can be a time-consuming and error-prone process.
By creating a custom AMI of an already-configured instance, we can quickly and easily launch new instances with the exact same software and configuration settings. This can help to reduce errors and ensure that all instances are consistent.
The ability to launch EC2 instances from a custom AMI equips organizations with the ability to rapidly scale their web applications according to changes in demand.
SECTION 1
In this section, we will configure an EC2 Instance with a user data script that updates all packages, installs an Apache web server, and starts the Apache web service.
Amazon EC2 User Data is used to run scripts when an instance starts for the first time. With user data scripts, we can install updates, install software, and even download files as soon as the instance starts.
Step 1
Firstly, navigate to the EC2 dashboard on the AWS management console, and click on launch instance.

Next, give the instance a name

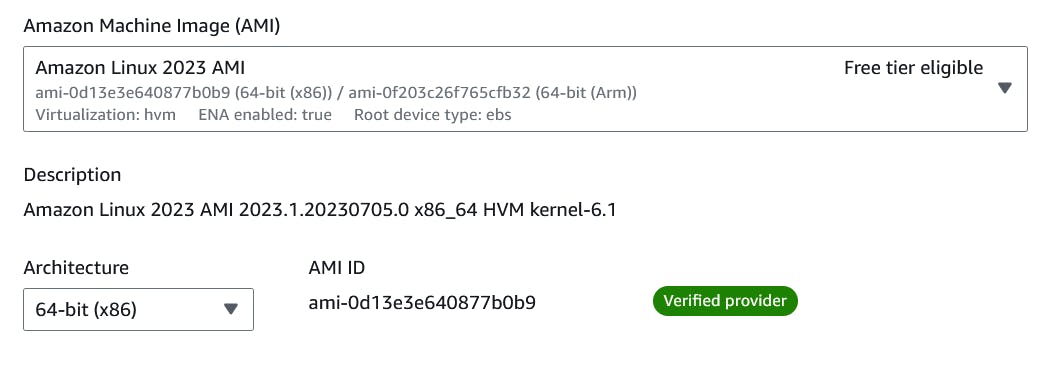
Now, select an AMI of your choice. For this project, I’ll be using the Amazon Linux AMI.

This is the configuration of the AMI
You can leave the instance type as “t2.micro” since this project does not require a lot of computing power.

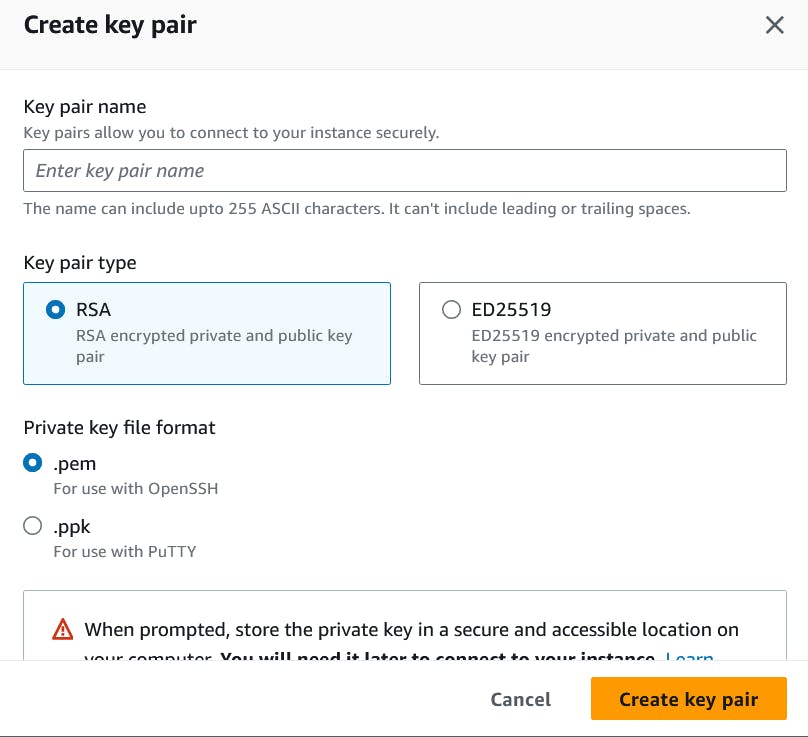
Next, select an existing key pair or you can create a new one. A key pair is used to securely connect to your instance.

To create a new key pair, give it a name, select the Key pair type as RSA and Private key file format as .pem
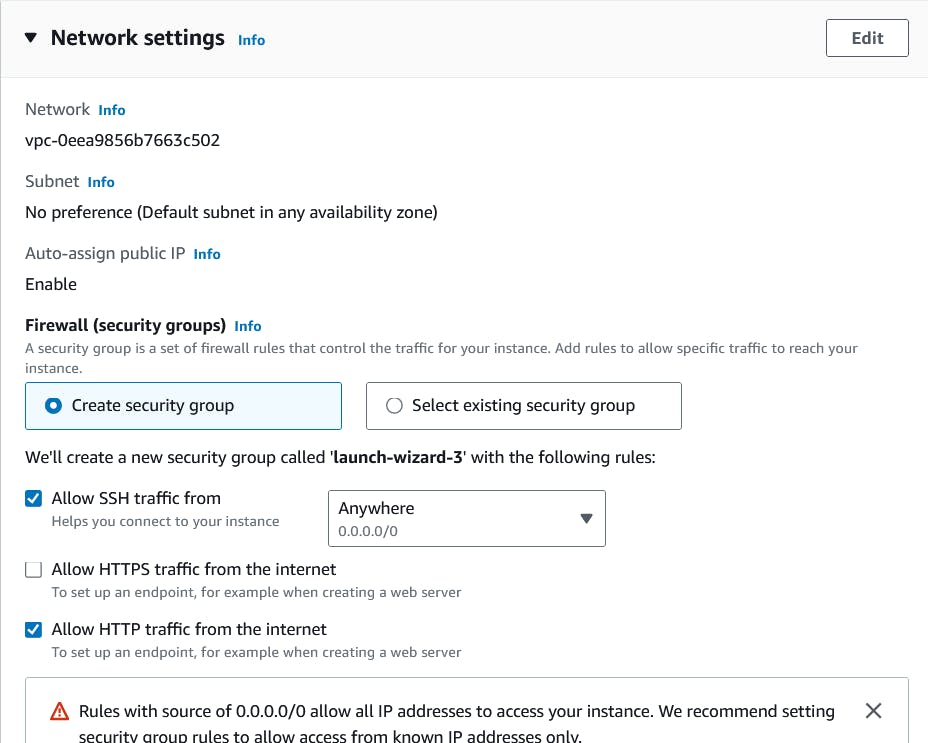
Under the Network settings section, you need to ensure that the security group selected is configured to allow HTTP traffic from the internet. This rule allows users to access any web server that is launched on your instance over the internet.
You can leave the storage as the default configuration.

Next, click on the “Advanced details” section.

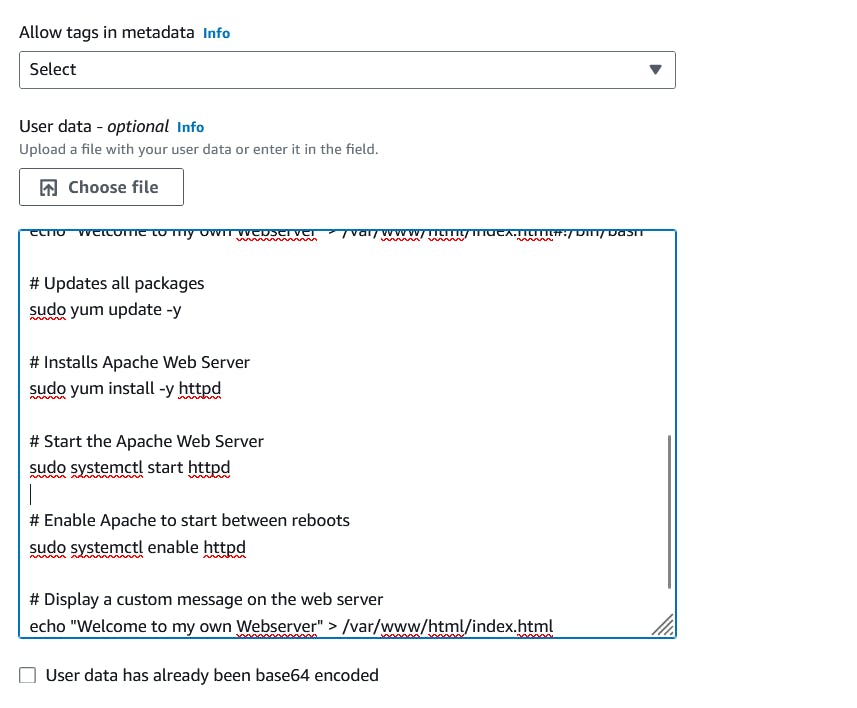
Scroll down to “User data”, and type in the following code.
#!/bin/bash

# Updates all packages
sudo yum update -y

# Installs Apache Web Server
sudo yum install -y httpd

# Start the Apache Web Server
sudo systemctl start httpd

# Enable Apache to start between reboots
sudo systemctl enable httpd

# Display a custom message on the web server
echo "Welcome to my new Webserver" > /var/www/html/index.html
You will see an interface like the below one :
And finally click on “Launch Instance”.

You can verify the running instance by navigating back to the dashboard.

Step 2
Now that the instance is launched, we can verify that the instance has the Apache web server downloaded and installed through the public IP address.
To do this, navigate back to the EC2 dashboard, select your instance (ensure the instance is running), and then copy the “Public IPv4 address” into your web browser.

And there we have it; the Apache web server is now running on the EC2 instance, and a custom message is being displayed on the server.

Step 3 (Optional)
Additionally, you do have an option of editing your user data after your instance has been launched.
To do this, you will need to first of all stop your instance. Next click on your instance, click on “Actions”, then “Instance settings”, “Edit user data”.


Now you can make changes to your user data and click on "save" and these changes will automatically run when your instance is restarted.

SECTION 2
In this section, we will create a custom AMI from the newly created EC2 instance.
Step 1
To create a custom AMI, ensure that the EC2 instance is running. If it is not running, you would need to start the instance.
Now that the instance is running select the instance, then select the “Actions” menu, then select “Image and templates”, and finally select “Create image”.

Step 2
On the “Create Image” page, you will be required to give the image a name. Note that you will not be able to change this name after creating the image.
You also have the option to include a short description of the AMI. The rest of the configuration settings can be left as default. Scroll down to the bottom of the page and select “Create image”.

Step 3
To view the newly created AMI, open up the navigation drawer (the hamburger icon on the left), and select “AMIs”.
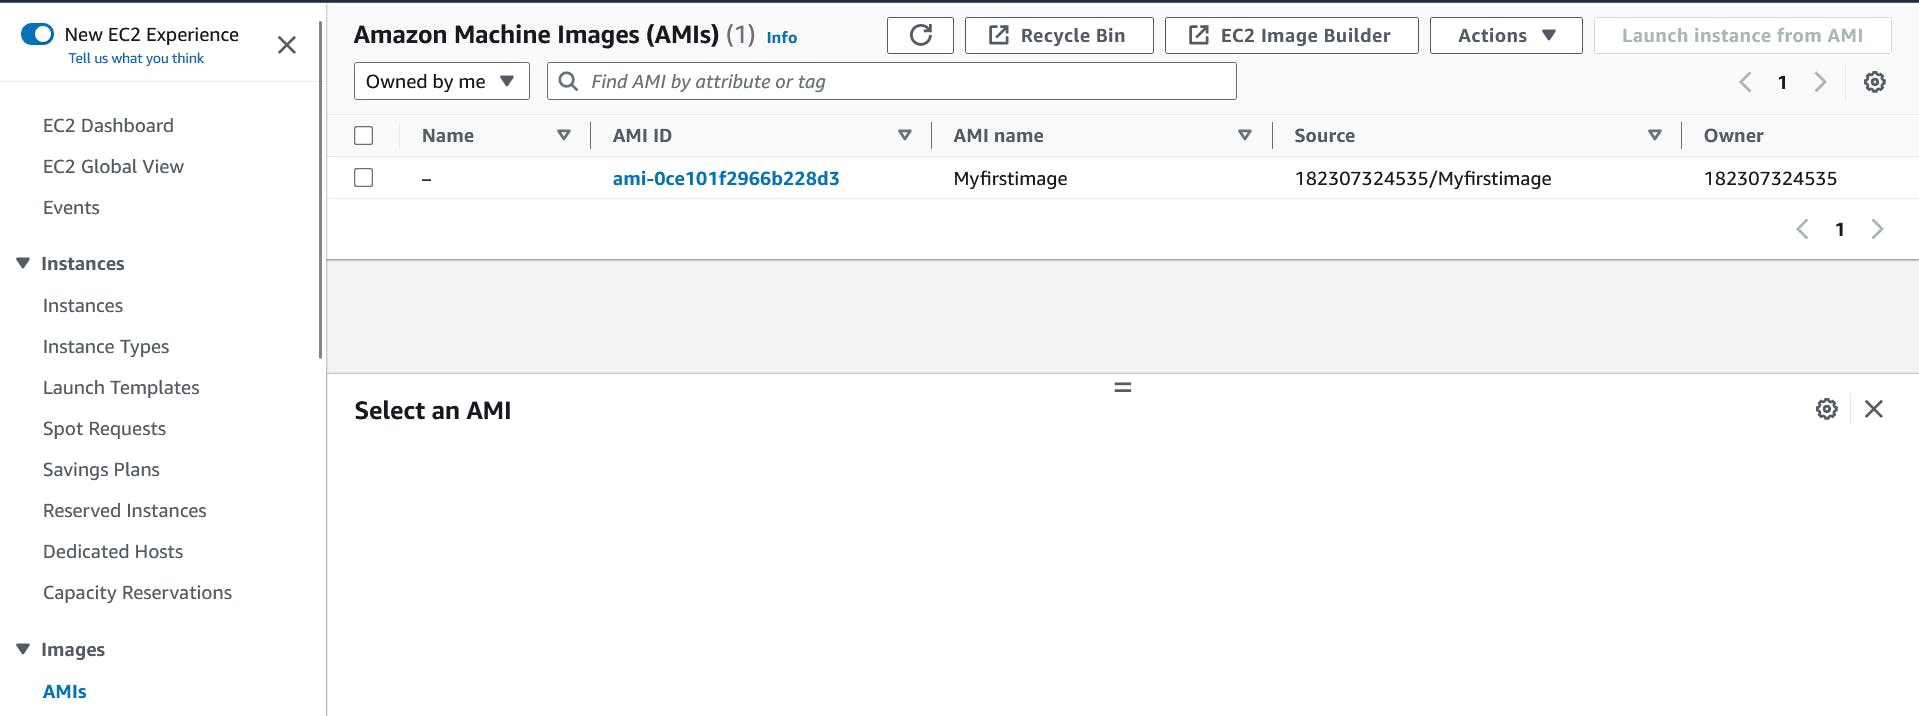
Alternatively, type in AMI in the search bar, and select “AMIs” from the results page.

SECTION 3
Now that we have successfully created a custom AMI, we can now begin to launch instances from the AMI.
Step 1
Select the custom AMI, and then select “Launch an instance from AMI”.

Step 2
We will configure this instance similarly to how we configured the EC2 instance in section 1 except for the user data script.
Give the instance a name, leave the AMI as the custom AMI, select your instance type (again you can leave it as “t2.micro”, since this project does not require a lot of computing power), select your key pair, select a security group that allows HTTP traffic from the internet or create one that does, leave the storage as the default configuration, and then select “Launch instance”.
Step 3
Once the new instance is up and running, copy the public IPv4 address into your web browser, and observe.
Notice that the Apache web server is also running on this instance, and the custom message is also being displayed.

You can repeat the steps in this section multiple times, to create multiple new instances from the custom AMI, and every one of the instances will have the Apache web server installed, and the custom message displayed.
This brings us to the end of the project.
How is it beneficial to launch EC2 instances from a custom AMI ?
Consistent environment: Ensures uniform configurations across instances.
Time and cost savings: Reduces manual setup effort and associated expenses.
Security and compliance: Establishes hardened and compliant baseline configurations.
Scalability and rapid deployment: Enables quick provisioning of multiple instances.
Simplified application deployment: Includes application code and dependencies in the AMI.
Versioning and rollbacks: Supports easy management of different configurations.
Offline work: Allows pre-configuration and offline storage for faster instance launch.
You have now learned how to launch EC2 instances from a custom AMI. If you like the blog don't forget to ❤️ and follow me for such awesome blogs. Your support encourages me to write more such blogs. Happy reading!